
You can manage individual students' groups from the Students Tab. To add students, follow the below steps.
1. From your dashboard, click on Students.

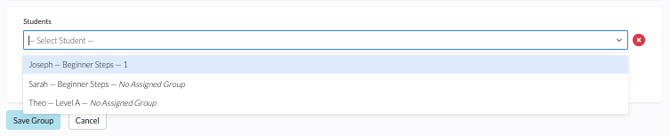
Digital Reader allows you to create student groups so you can assign books to multiple students in a single place. From the Groups Tab you can create and add students to a group all in one place. You can also add students to a group from the Students Tab.
This article will cover the following topics:
For information on assigning books to a group, please see Navigating the Book Assignments Tab.
To create a student group, follow the steps below. *Please note that student groups are not copied over as part of the Academic Term creation. This means teachers will need to create new student groups for their new classroom each term.
1. From your dashboard, click on Groups.

2. Click the Add New Group button.
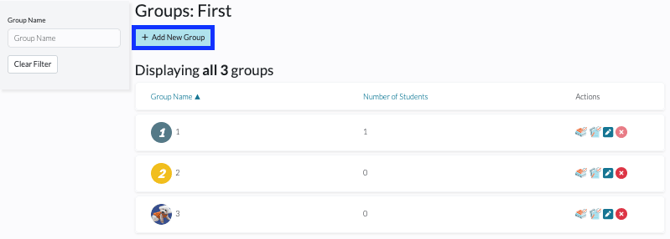
3. Give the group a name and choose a Group Icon (color or avatar).

You can manage individual students' groups from the Students Tab. To add students, follow the below steps.
1. From your dashboard, click on Students.

2. Locate the student you want to add to, change, or remove from a group, and click the Pencil icon to the far right.

3. Find the Group drop-down menu and select the group you want the student to be in. To remove a student from any group, select No Assigned Group.

4. Click Save Student to update.

