Navigating the Students Tab
The Students tab provides you with all the tools you need to provide a customized experience for your students using the Digital Reader and access to their recorded data.
This article will cover the following topics:
- Adding, Reviewing, Editing, and Removing Students
- Bulk Editing Students: Groups Only
- Providing Students and/or Families with Login Information
- Accessing Individual Student Data
- Managing the Student Bookshelf
Adding, Reviewing, Editing, and Removing Students
To add, review, edit, and/or remove students in a classroom, follow the steps below.
1. From your dashboard, click on Students.

2. To add students, click on the +Add Student button. You can also add students in bulk through importing by clicking on the Import Students button. For step-by-step instructions on adding and importing students, see How Do I Add Students to My Classroom?.

3. To edit existing students, click on the Pencil icon. When editing an existing student, the fields for Student's Name, Student ID, Instructional Level, Reading Adventures Level, Username, and Password will update the student's account. The fields for Group, Grade, Digital Reader License, Bookshelf Lexile Range, Bookshelf Reading Levels, and Bookshelf Phonics Focuses are all term-specific and will need to be entered.


4. To remove students from a classroom, click on the X icon. *Please note that removing a student will only remove them from that specific classroom. The student will still be an active student in the school, and the school or district admin will be able to reassign them to another classroom.

If your district or school admin has locked your students, only district and school admins can create students, delete students, or modify student identities and login credentials. However, once the admins have added students, teachers are able to modify reading settings, assign reading content, and record assessment scores and progress monitoring data. Please contact your district or school admin if you have any questions. For help on where to find your account admin(s), see Where Can I Find the Admins on My Account?
Bulk Editing Students: Groups Only
1. From your dashboard, find and click the Students tab.

2. Click on the Bulk Edit Students button at the top of your student list.

3. Click on the dropdown under Group Name for each student whose group you want to assign/change. When you are done with all edits, click the Save Bulk Edits button at the top. Use the Cancel Bulk Edits to go back without saving any changes.

Providing Students and/or Families with Login Information
To provide login information to your students and/or their families, follow the steps below.
1. From your dashboard, click on Students.

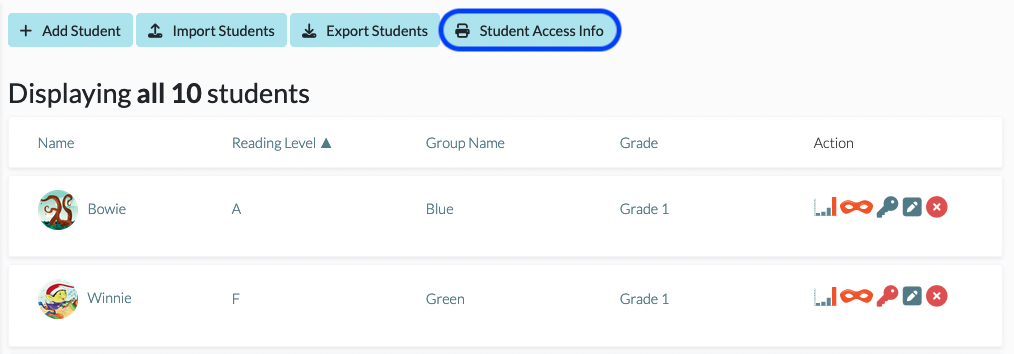
2. Look for the Key icon under the Action column to the right of each student in your classroom roster.
Make sure that the Key icon is blue; if it’s red, you will need to set up the student’s username in your student’s settings and set the Digital Reader License to Yes for the student before you can continue.
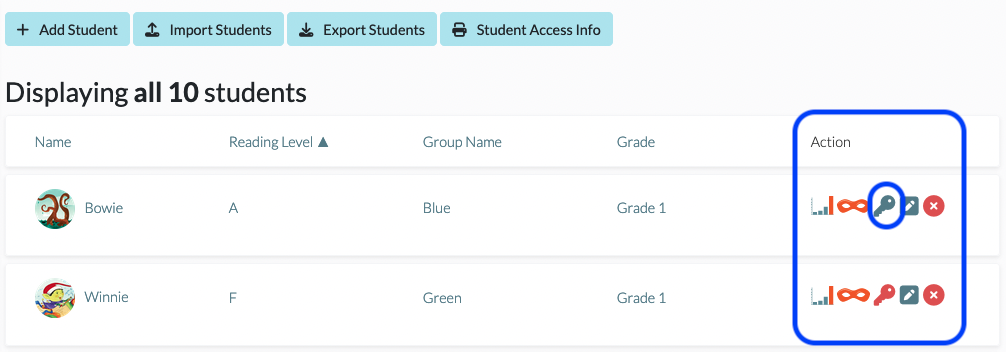
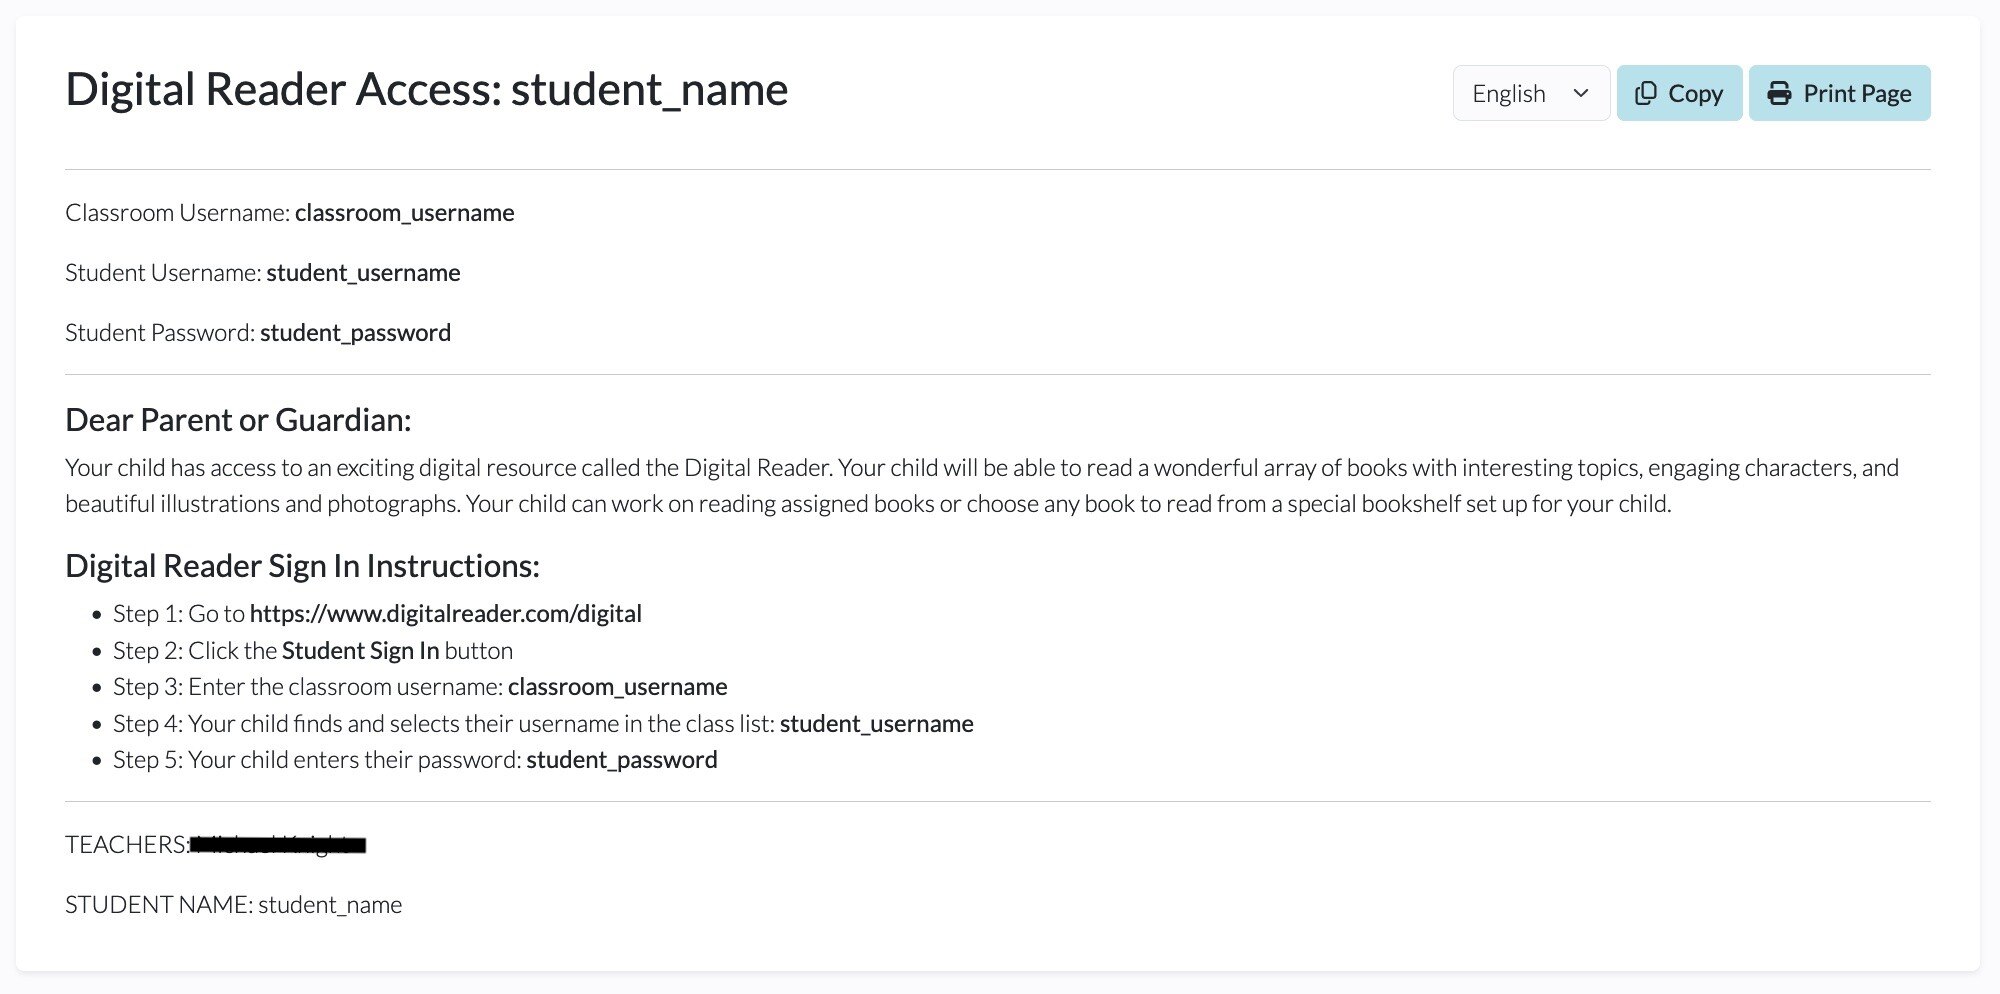
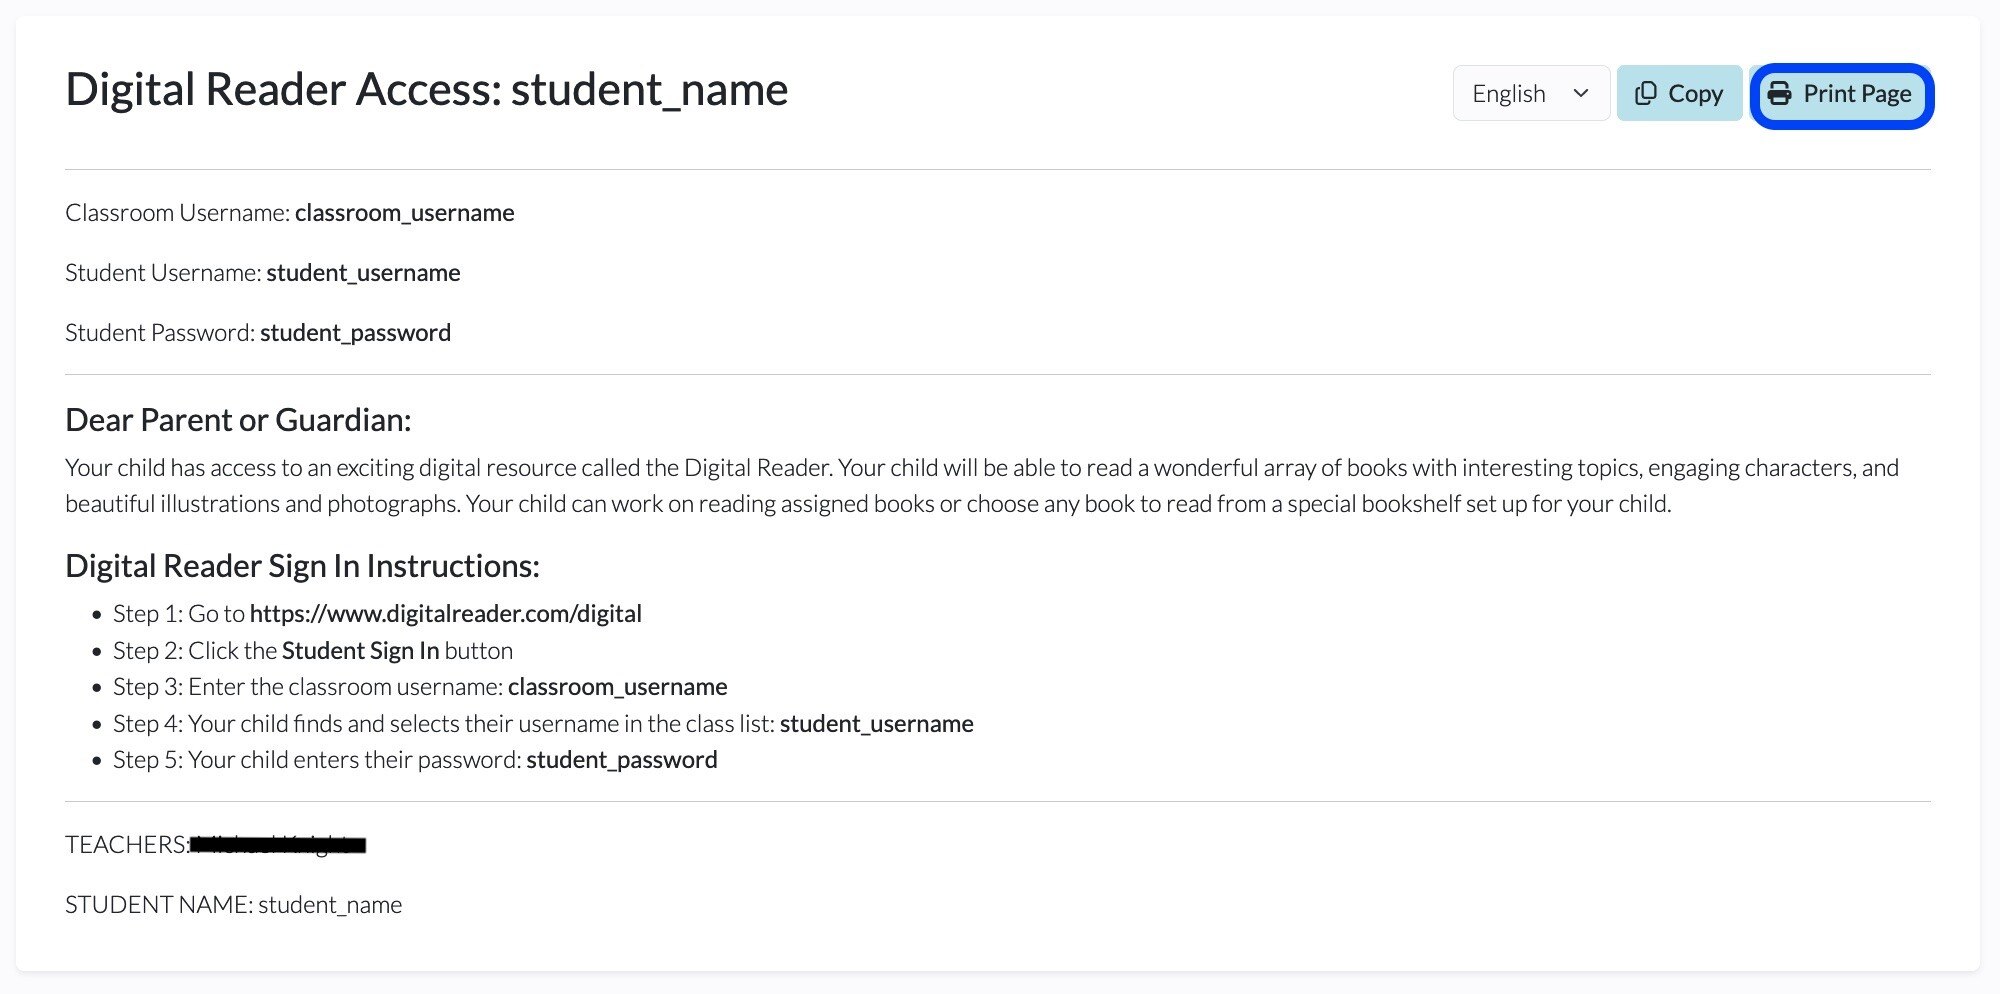
3. Once the Key icon is blue, you can click on it to access a credential letter, which contains step by step instructions for your students that can be shared with families.
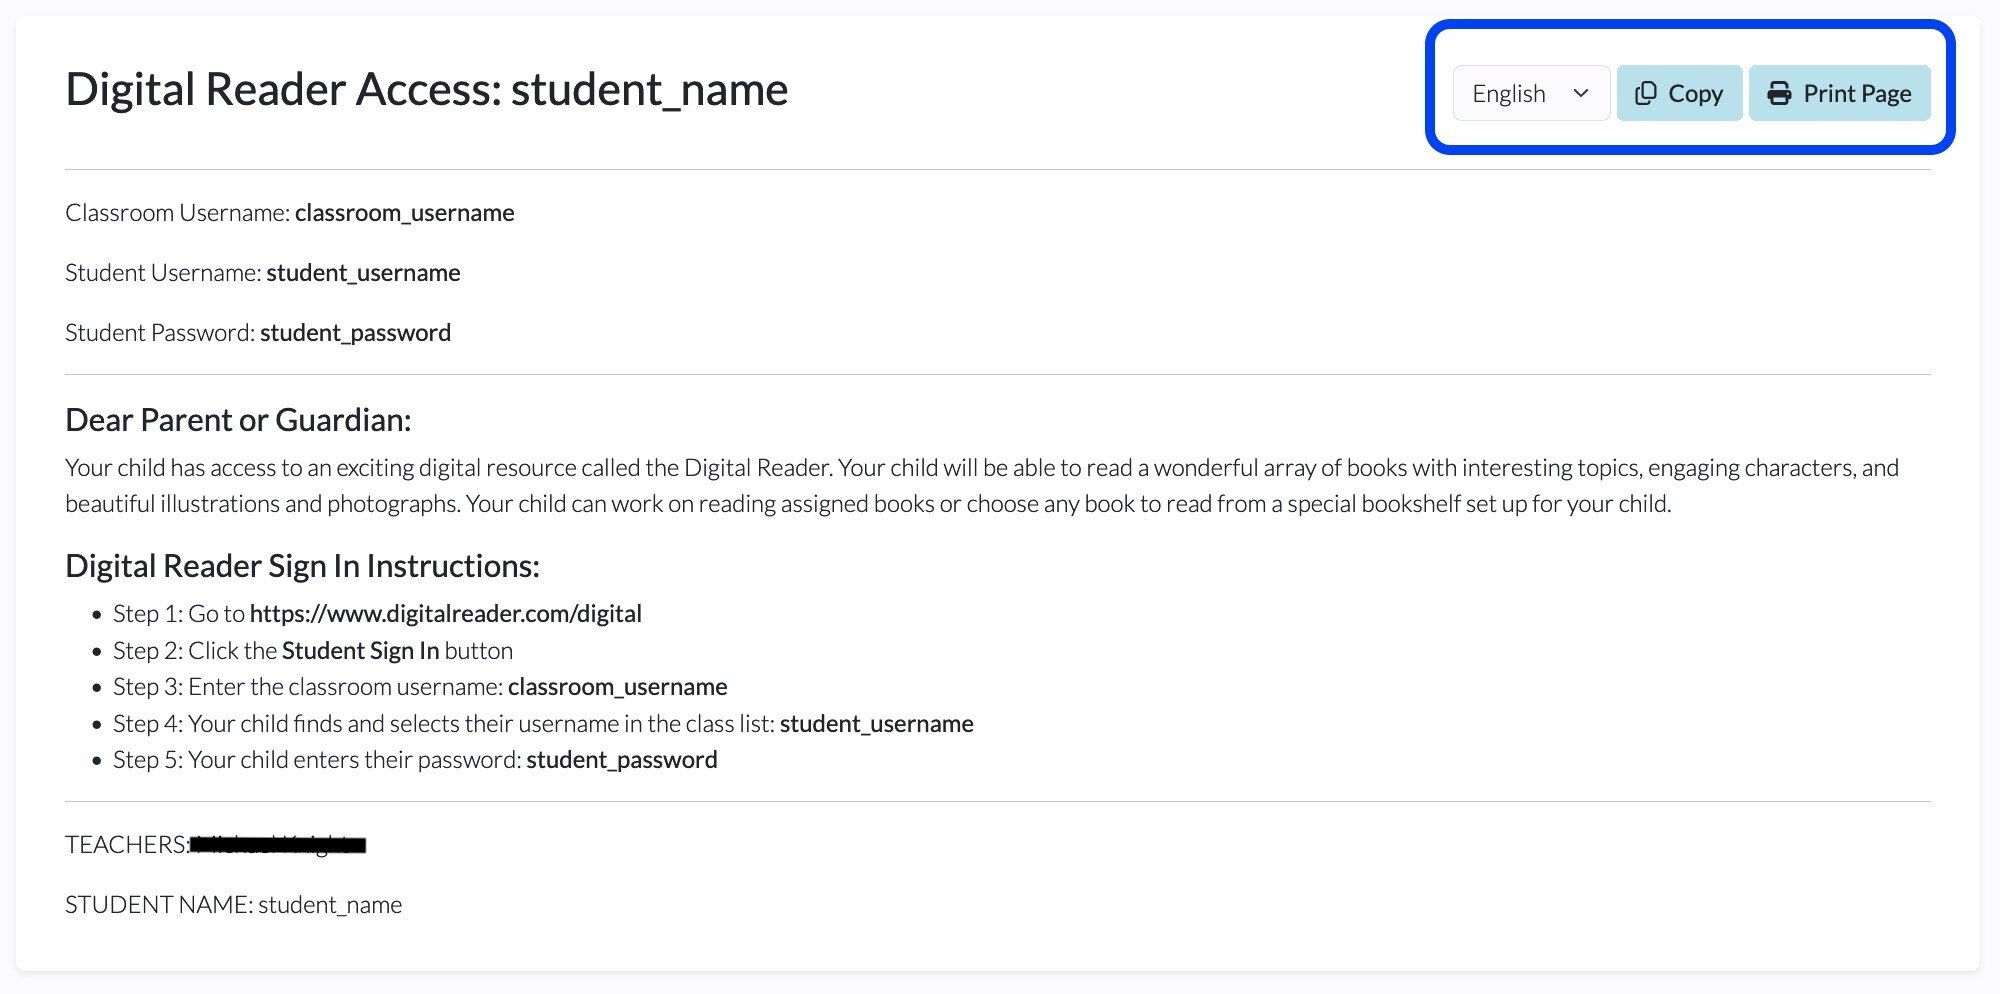
4. The credential letter can be copied/edited by clicking on Copy. It can also be printed by clicking on Print Page. If you need to change the language for the letter, use the drop-down menu. Currently, the supported languages are English, Spanish, French, and Chinese.
5. If you would like to print the full class list of credential letters, click on the Student Access Info button. Then click on Print Page.
Accessing Individual Student Data
If you'd like to access, edit, or delete student assessment data, follow the steps below.
1. From your dashboard, click on Students.

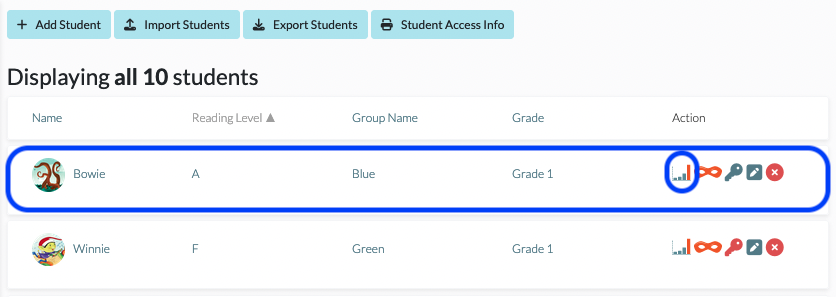
2. Locate the student whose assessment data you'd like to access and/or edit and click on the Graph icon to the right of their name.
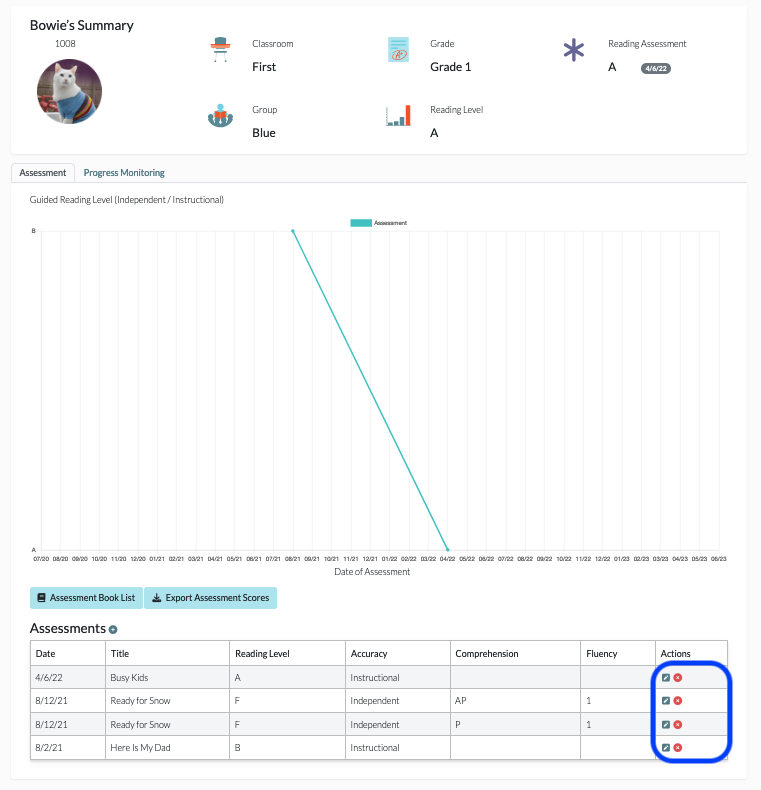
3. To edit an entry, scroll down to locate the assessment entry and click the Pencil icon to edit and make the change(s). To delete an assessment, click the X icon.
Managing the Student Bookshelf
The Digital Reader Student Bookshelf gives students an opportunity to read a plethora of books. Your students will only be able to see the books that are on their Bookshelf. To manage each student’s Bookshelf individually, follow the steps below.
1. From your dashboard, click on Students.

2. Locate the student whose bookshelf you want to manage, and click the Pencil icon on the far right under the Action column.

Alternatively, you can click on the student's name and then click the Student Settings button with the Gear icon located on the student dashboard.
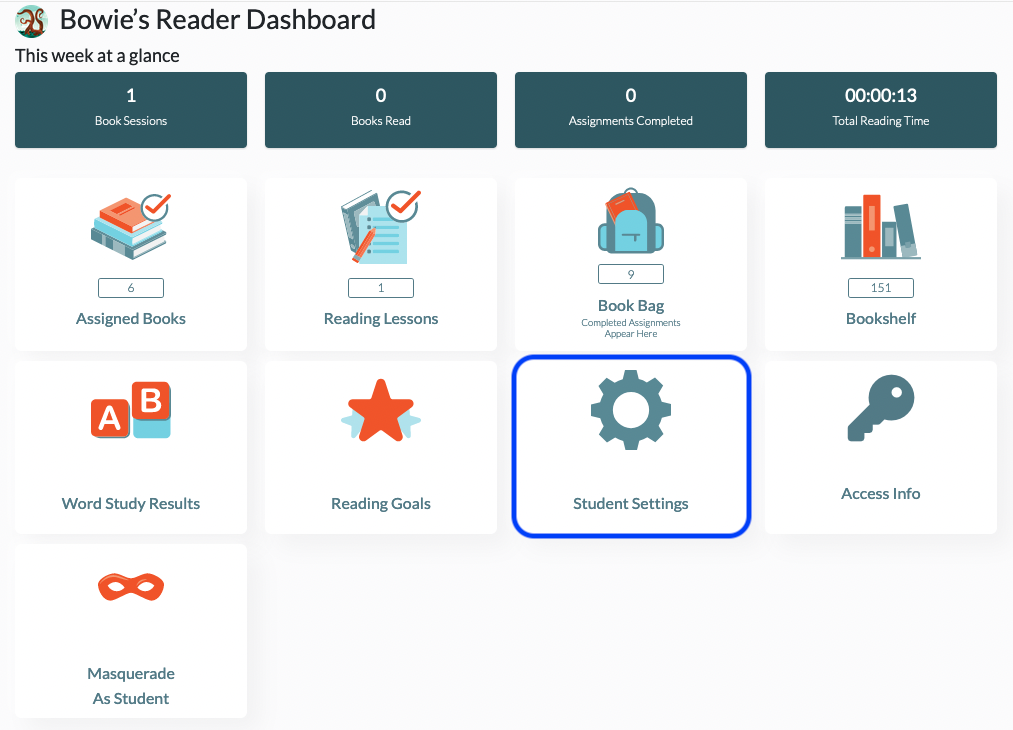
3. This opens the Edit Student page. Select the Bookshelf Lexile Range, Bookshelf Reading Level(s), and/or Bookshelf Phonics Focuses from which you would like your student to be able to read independently.

4. Click Update Student to save.
- For more information about choosing the levels for your student's Bookshelf, please see Determining Levels for a Student's Bookshelf.
- If you need to clear books off of your student's Bookshelf, please see Clear Bookshelf Button.
- If at any time you'd like to see what your student is seeing, click on the Mask icon to enter Masquerade mode. For more information, please see Is There a Way to See What My Student Is Seeing When They Log In?
