
Moving a student to a different group is simple.
- Change a student's group in the Student's Profile
- Change multiple students' groups at once with Bulk Edit Students
- Add one or multiple student to a group from the Groups Tab
2. Locate the student you wish to place in another group, and click the Pencil icon to the right of their name.
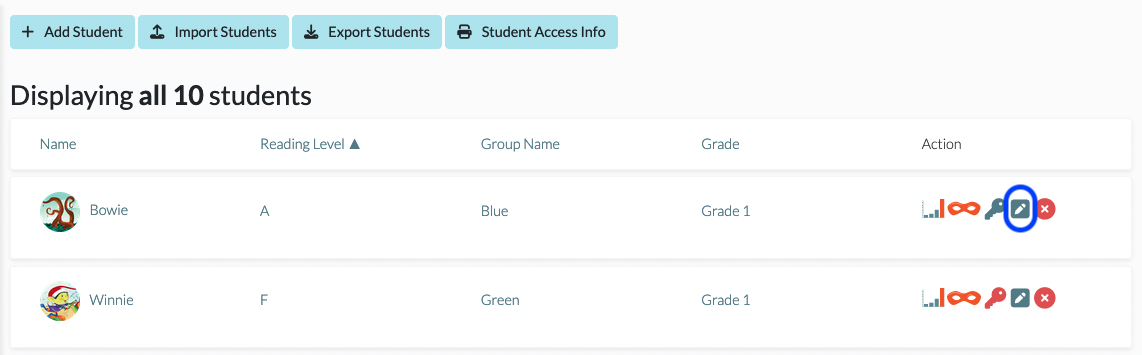
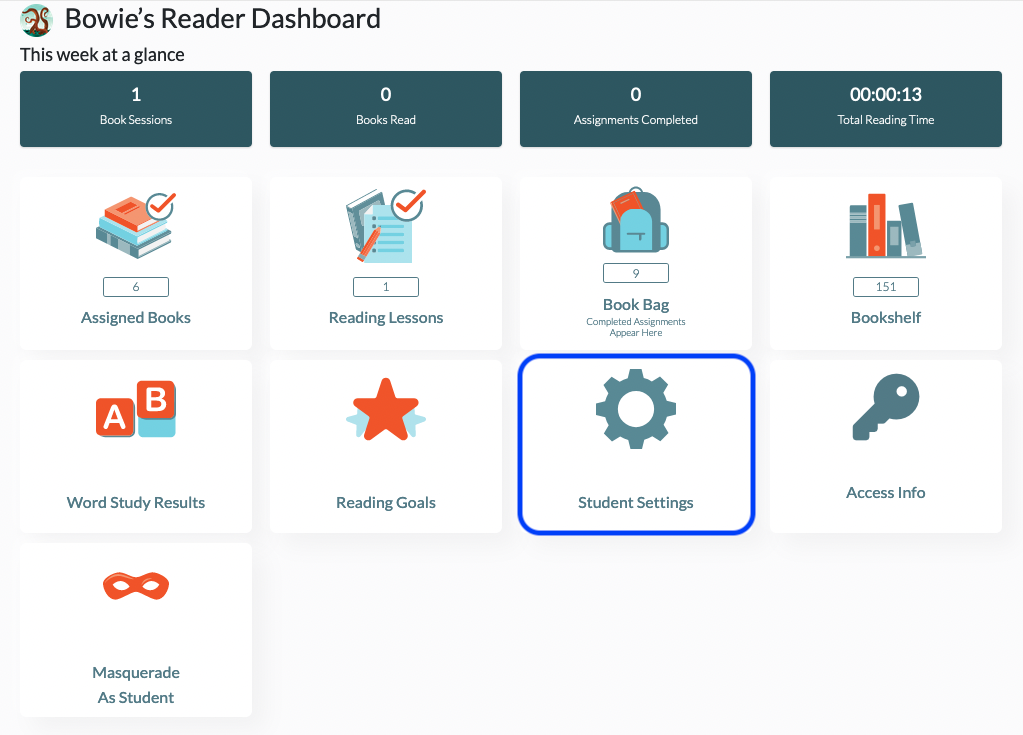
Alternatively, you can click on the student's name and then click on the Student Settings button with the Gear icon located on the student dashboard.
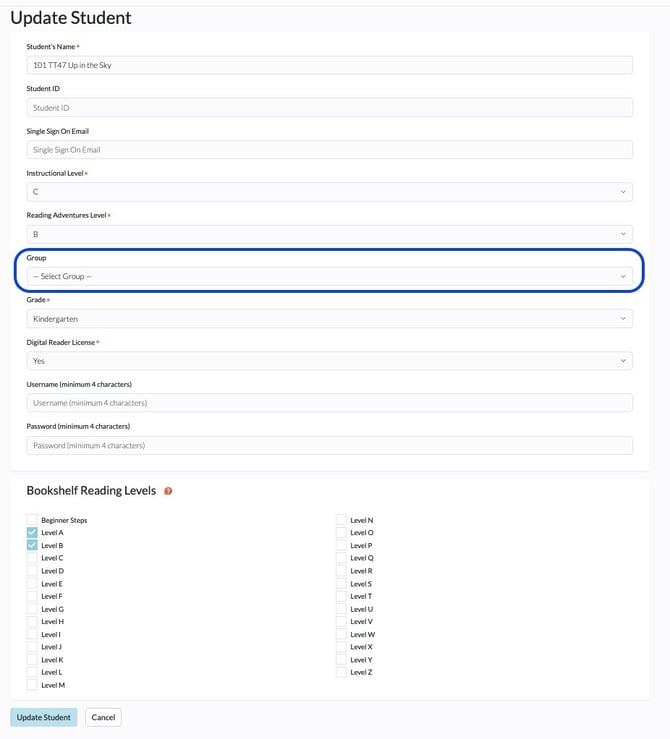
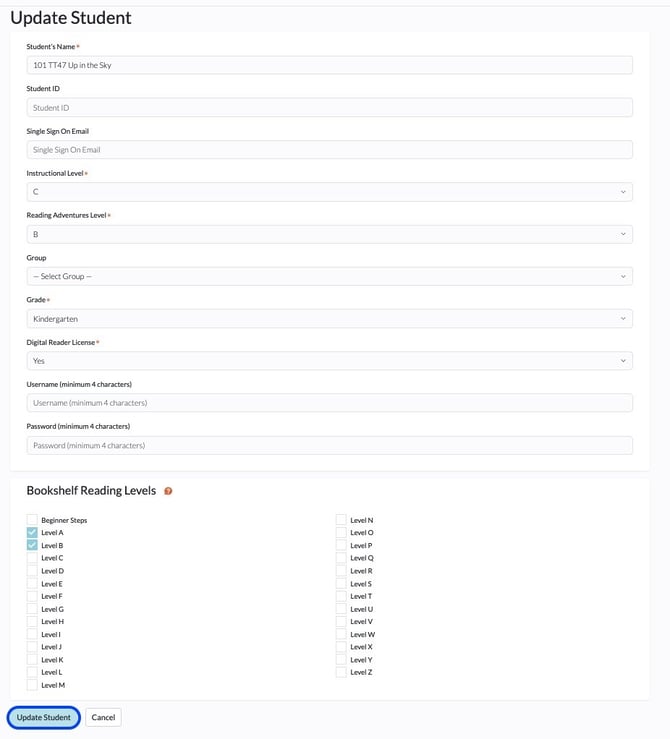
3. This will open the Update Student page. From there you can adjust the student’s group using the drop-down menu under Group. If you wish to remove the student from all groups, select the blank option in the drop-down menu.
Bulk Editing Groups from the Students Tab
1. From your dashboard, find and click the Students tab.

2. Click on the Bulk Edit Students button at the top of your student list.

3. Click on the dropdown under Group Name for each student whose group you want to assign/change. When you are done with all edits, click the Save Bulk Edits button at the top. Use the Cancel Bulk Edits to go back without saving any changes.

From the Groups tab


