Admin: How to Add or Import Students
When setting up your future Academic Terms, we recommend copying the data from your current term. This will copy over schools, classrooms, and teachers. It does not copy over students. You also have the option of adding students individually. To add students, please follow the steps below.
Import Students
1. From the District/School Dashboard, click the Students button to access your student list.

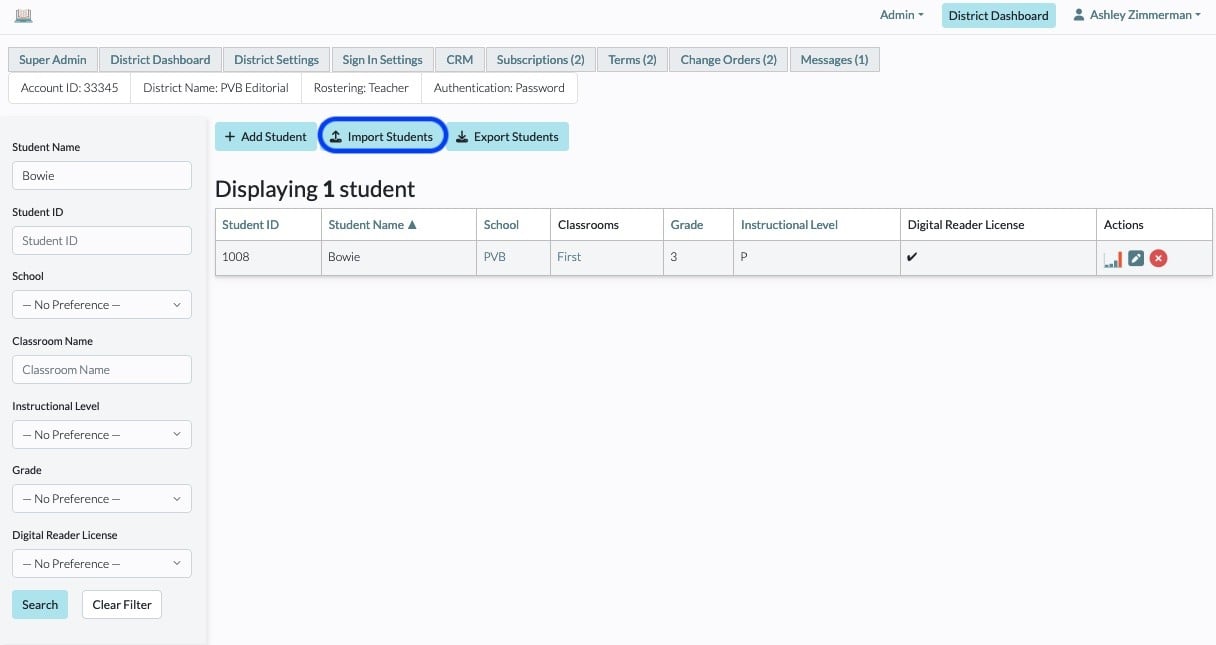
2. To upload your new roster, click the Import Students button.
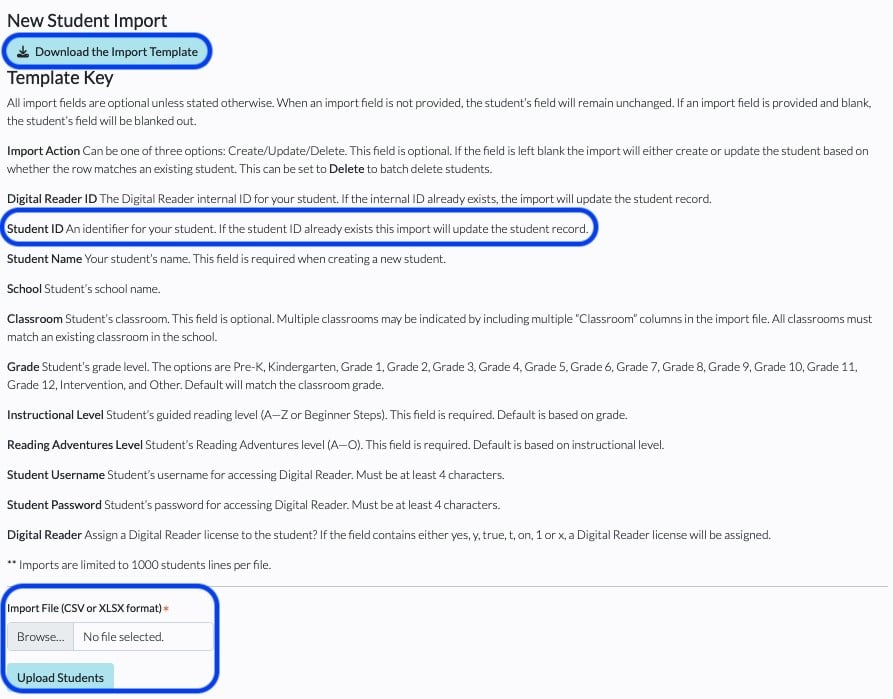
3. The New Student Import page provides an Import Template to help format a spreadsheet with the correctly named headers and necessary data. Download this template to create your roster import. Use the Template Key to navigate the fields in the downloaded template.
4. If you are updating students from last year, exporting the student list from the current term, updating the spreadsheet, and re-importing it ensures you are matching all student-specific information, such as name, Student ID, current reading level, SSO email, username, and password.
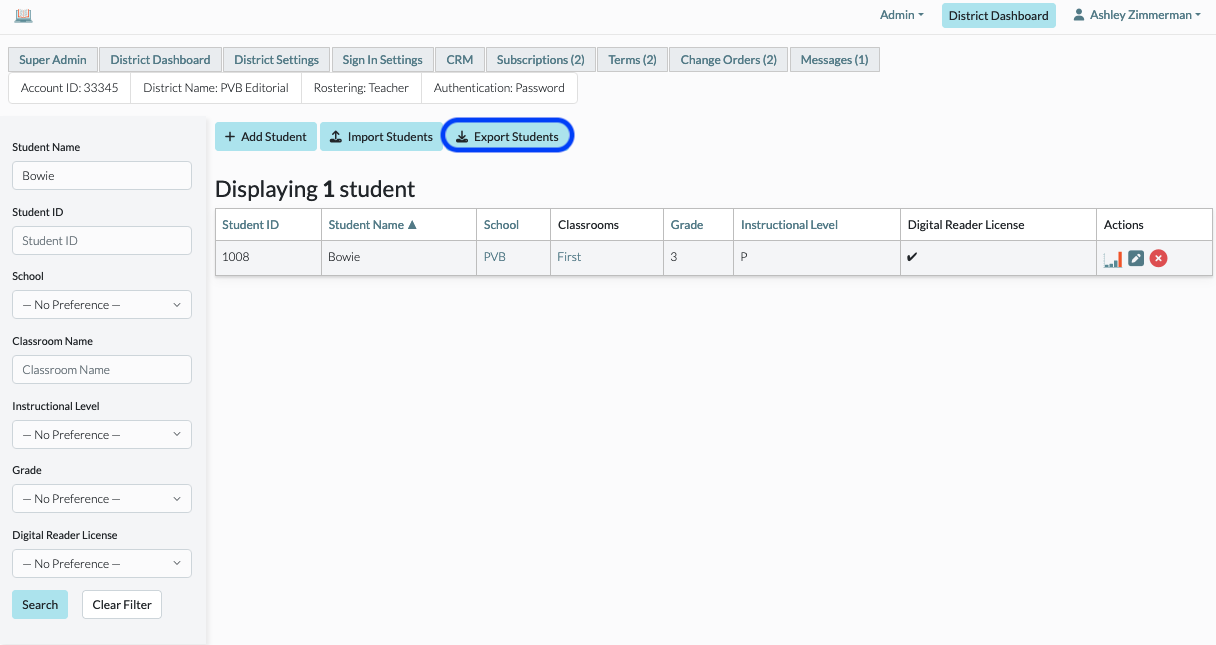
IMPORTANT: Students are matched across terms based on their Student ID. If you are hoping to maintain student data across terms, ensure that your Student IDs are correct in your current term before importing students to a future term. Exporting current students will help ensure these students are connected correctly. If you need assistance with correcting Student IDs or are unsure what value was used for an ID in the past, please reach out to support@digitalreader.com.
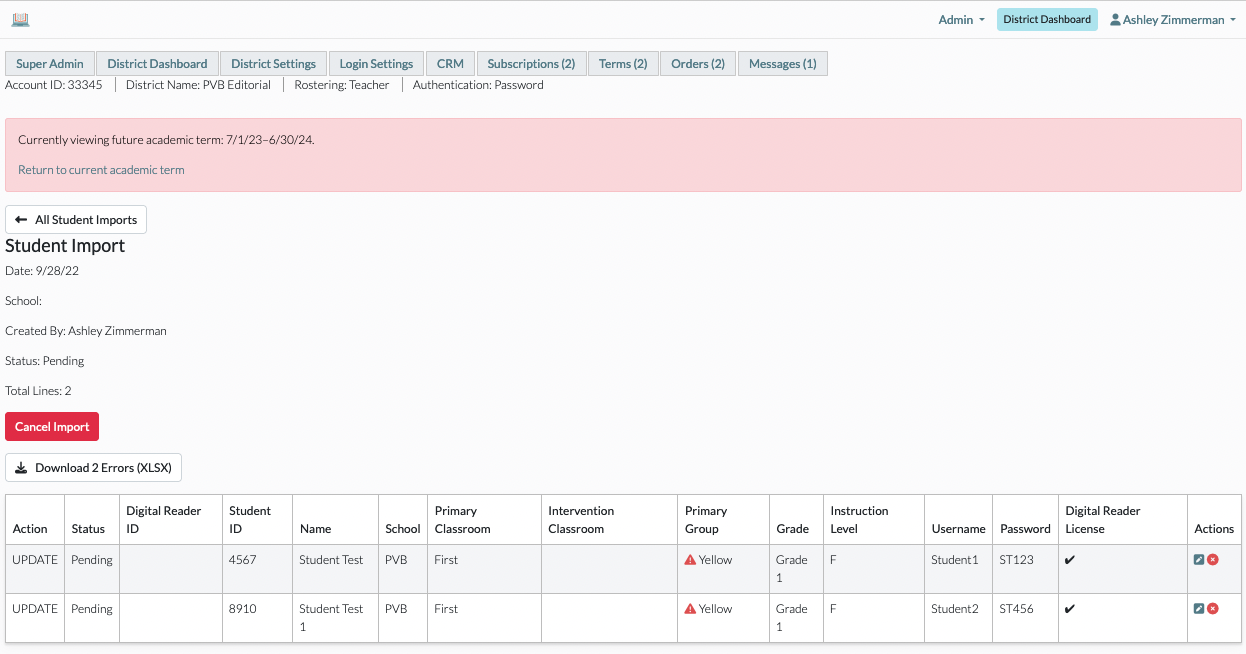
5. You will have the opportunity to review any errors, missing data, or make any updates prior to finalizing your student import. Please contact support@digitalreader.com if you need any assistance correcting these errors.
Add Students Individually
1. From the District Dashboard, click the Students button.

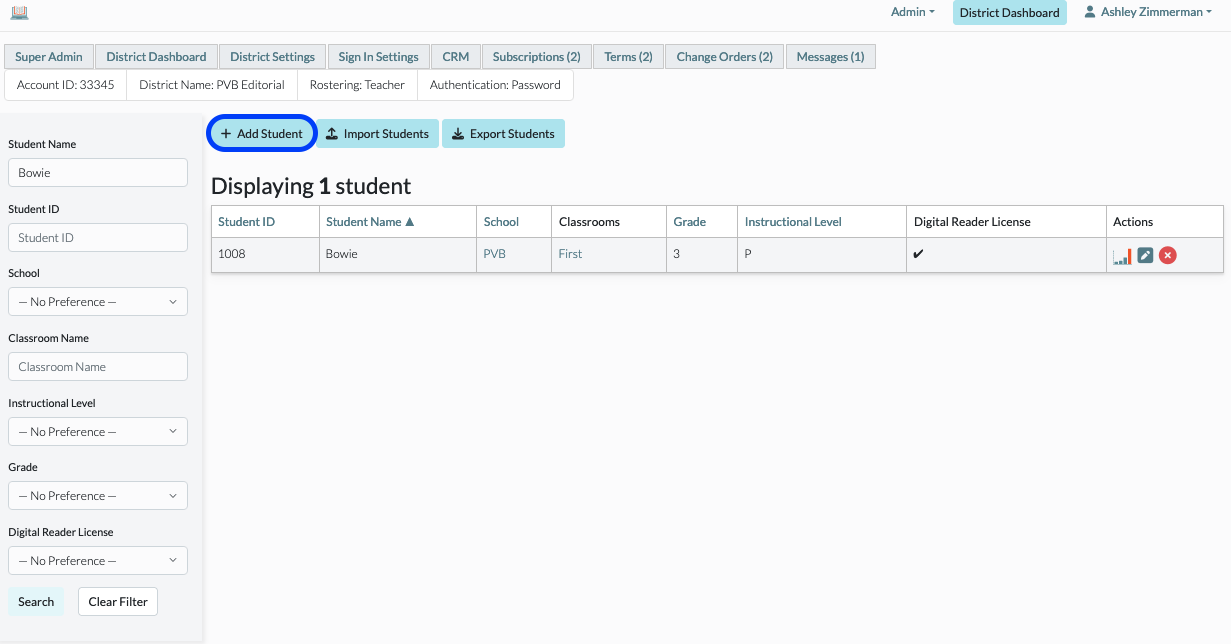
2. To add a new student, click the + Add Student button.
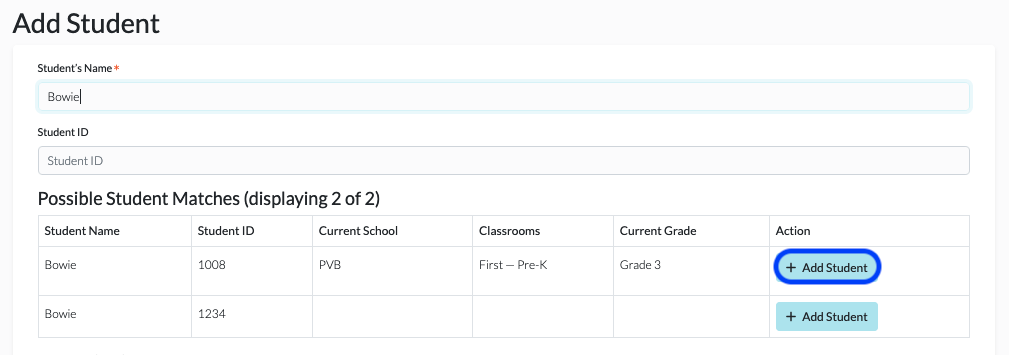
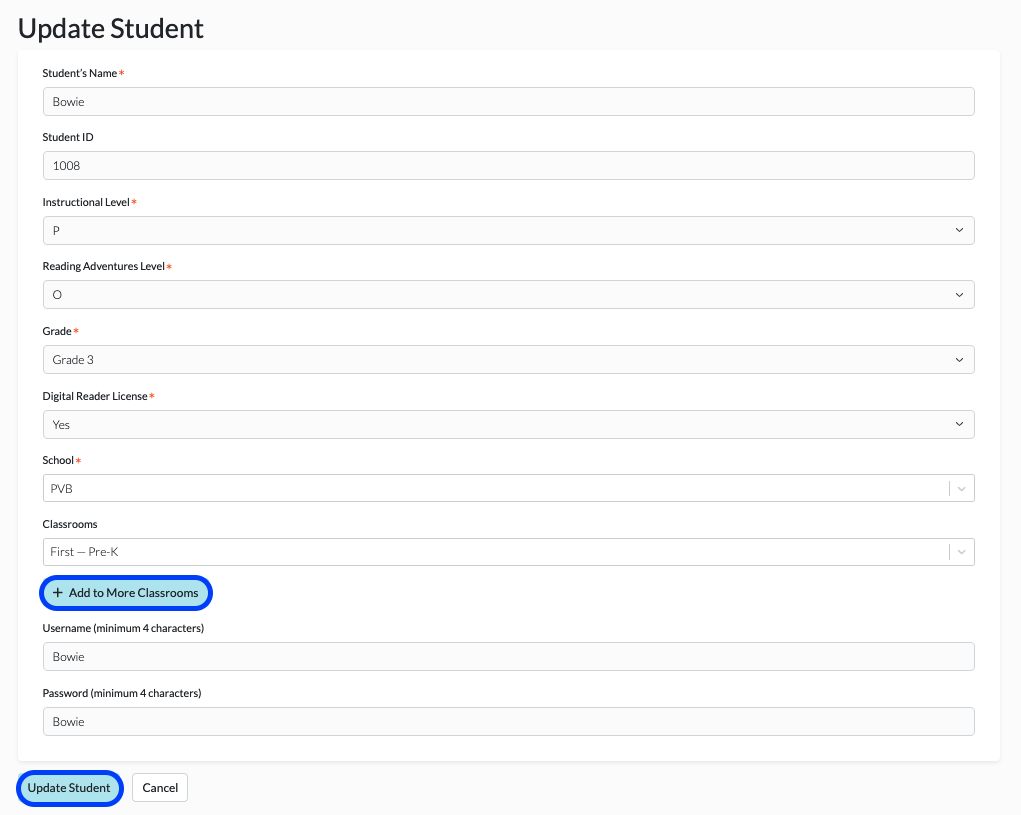
3. Begin filling in the information for the new student. Any existing student matches will populate under the Possible Student Matches section based on the fields Student's Name and Student ID. Click on the + Add Student icon next to the student to update and add that student to one or more classrooms. When you have updated the student's information click on Update Student to add the student to your roster.
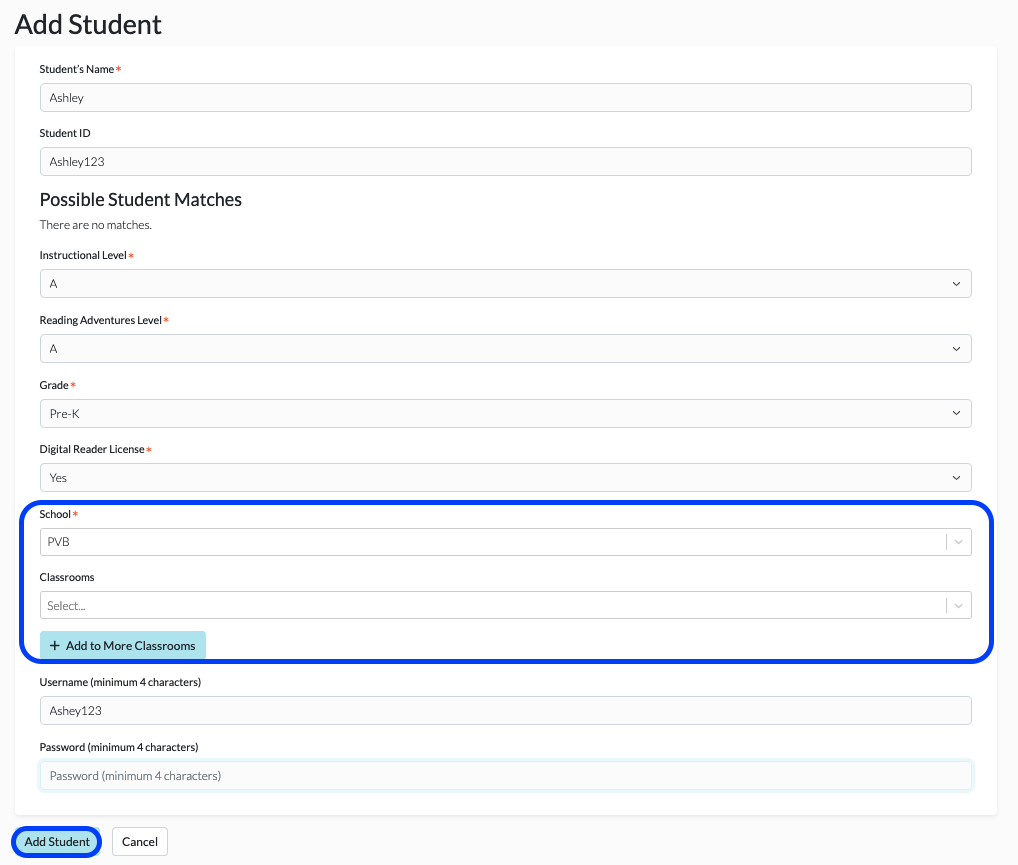
4. If no preexisting students populate, fill in the information for the student and click Add Student at the bottom of your screen. Your student is now a part of your roster. Please note the student's school needs to be added before you can place them into one or more classrooms.
*School, classroom(s), group, and grade changes will only be reflected in the selected term, and will not change any other terms. Exceptions to this are settings that are student-specific, such as name, Student ID, current reading level, username, and password.
